
This is just about everything the average shooter could possibly want to know about mounting a scope. We’re walking through the whole process step by step, explaining not just the “how” but the “why” behind each step. Our demo gun is an AR-15 with low-powered variable optic, but most of these procedures should work for other types of rifles and optics as well.
You’ll find all the details in the video below, or scroll down to read the full transcript. As with a lot of our “how to” type videos, the transcript alone doesn’t really do justice to the material. We’ve provided a few screen grabs from the video as usual, but some of the demonstrations really need the video to make sense. Since this is kind of a long one, we’ve got time code shortcuts below so you can skip around to the parts that are most relevant for you.
Video Time Code Shortcuts
00:02 – Introduction
01:39 – Choosing the right rings and mounts
03:29 – Understanding cheek weld and optic height
06:43 – Cheap versus affordable versus premium scope mounts
08:29 – Tools needed for mounting an optic
09:56 – Mounting a rifle optic – safety check
10:22 – Does your rifle need a scope base?
11:38 – Initial placement of the mount and optic
15:07 – Using thread locker/Loctite
18:27 – Setting eye relief
21:20 – Torquing the mount screws
23:28 – Leveling the optic
25:19 – Torquing the scope ring screws
26:30 – Adding witness marks
27:38 – Final thoughts
Hey guys, Chris Baker here from LuckyGunner.com. Today, I’m going to show you how to mount an optic to your rifle and then next time, we’re going to go out to the range and I’ll show you how to sight in that optic.
The main demo gun I’m using is an AR-15 with a low power variable scope. Swamp Fox Optics kindly sent us this 1-10x Arrowhead scope to use for this video. Most of the procedures I’ll go through are the same regardless of what gun or optic you might have. I’ll try to point out the cases where the steps are a little different for things like bolt actions or red dot sights. Most of those differences will be in the mounting instructions. The sighting-in process is not going to change much from one setup to another.

There are dozens of different ways to do just about everything I’m going to show you. This is not necessarily the right way or the best way, it’s just a way. My goal is to show you the most simple methods possible that will work for the majority of shooters. If you’re wanting to get into something like long range precision shooting, that’s a whole different ballgame. Those guys do all kinds of special voodoo on their scopes and mounts, and I can’t help you with that. For the rest of you, this will probably work.
Choosing the Right Rings and Mounts
Before we get into actually mounting the scope, let’s talk about scope rings and mounts for just a minute.
Once you’ve put a bunch of effort into researching and shopping for an optic, figuring out what kind of rings and mount you need is often just an afterthought. But the hardware is super important and deserves some serious attention. I’ve seen and experienced far more problems at the range that were due to bad mounts or improper installation than from shortcomings of the optics themselves.
I’m not going to walk you through all of the different options. You’ll have to research what kind of hardware makes the most sense for your optic and what you’re planning to do with it. But I will hit a couple of important points that sometimes confuse people when they’re new to all of this.
If you have a red dot or other non-magnified optic, it probably comes with a mount. Most of the micro red dots and open emitter optics don’t need rings, they just attach directly to a mount with screws. If that’s what you have, you’ll be able to skip a bunch of the steps when we get to mounting the optic. The mount that comes with the red dot is probably fine for most shooters. Unless you need the optic to be at a different height or you want a quick detach feature, the factory mount is usually serviceable.
Your red dot might come with two mounts — a low and a high. The high one is for AR-style rifles. The low one is for pretty much everything else.
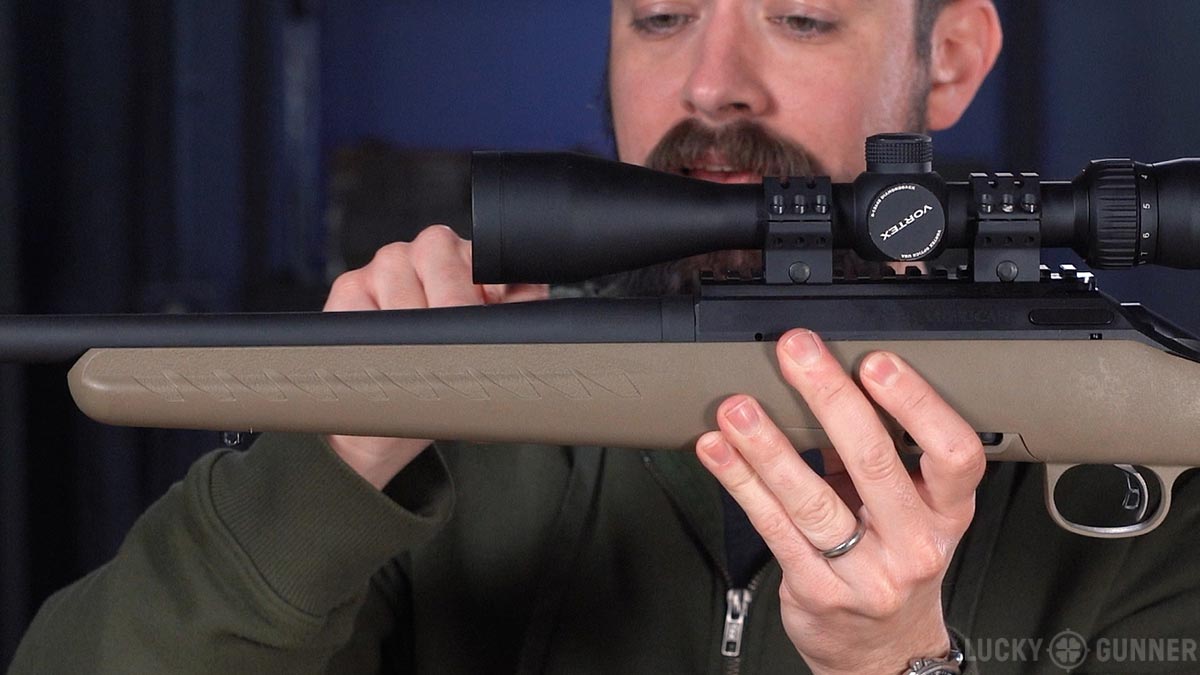
Understanding Optic Height and Cheek Weld
Regardless of what gun or optic you have, it’s helpful to understand the relationship between optic height and cheek weld — that’s the spot where the stock contacts your cheek, usually just below the cheek bone.
Most rifles and shotguns are designed so the comb of the stock is on a slightly lower plane than the barrel. So when you rest your cheek on the stock, your eye is in line with the sights or optic right on top of the barrel. Generally speaking, you want your red dot or scope to be as low and as close to the receiver as you can get it. That will help you maintain a solid cheek weld. A good cheek weld helps make sure your eye is in the same spot every time you get behind the rifle. If the stock is on your jaw or your chin, your consistency and accuracy usually suffer.
With a magnified optic, you just have to make sure that the scope isn’t so low that the barrel is touching the objective bell — that’s the part of the scope that flares out on the objective end — the end facing your target. There needs to be a little gap in between the two. So when you’re choosing your scope rings, you generally want the lowest rings that allow some clearance for your scope. If you have to get high rings, you may need to add a cheek riser to your stock to keep your eye in line with the scope.
No touching!
ARs were designed with a buffer tube that’s part of the action and that tube is in line with the barrel. Since the stock attaches to the buffer tube, it can’t really go lower than the plane of the barrel like other rifles. That means when you rest your cheek on an AR’s stock, your eye is much higher relative to the barrel. So the sighting system has to be higher as well.
Most AR mounts place the center of the optic about an inch and a half above the receiver. Recently, a lot of people are gravitating toward higher mounts. The 1.93-inch mounts, in particular, have an enthusiastic following. They were initially designed for shooting when you’re wearing things like helmets, goggles, and masks. But even without all that stuff, some shooters find the taller mounts allow them to maintain a more upright head position when they’re standing. I have found the taller mounts are difficult to use when you’re in a prone position and you need a really solid cheek weld.
There’s not necessarily a correct height for your optic. It depends on your anatomical proportions and what you’re doing with the gun. Just be aware that it’s a decision you need to make on purpose.
Cheap vs Affordable vs Premium Scope Mounts
One other point I’ll mention is about the quality and cost of your scope mounting hardware. You can get a pair of cheap, lousy scope rings for 12 bucks, or you can spend $400 or more on a top-shelf mount that will hold zero even after you chuck the rifle out of a helicopter.
Choosing mounting hardware is a lot like choosing optics themselves. You pretty much never want the cheapest you can get, but these days, you don’t have to spend a lot to get something that’s pretty decent. The price jump from “bad” to acceptable” is a lot shorter than the jump from “acceptable” to “outstanding.” If you’re looking at basic one-piece mounts, there are plenty of options in the $50-100 range that will work fine for the kind of shooting most of us are doing.
You might need to spend a little more if you’re one of those precision long range shooters I mentioned. If your optic might get knocked around a lot like in a duty or military context or if you’re shooting a cartridge with a lot of recoil, or if you’re just doing a large volume of shooting — like several thousand rounds a year — those also might be good reasons to look at a more premium mount.
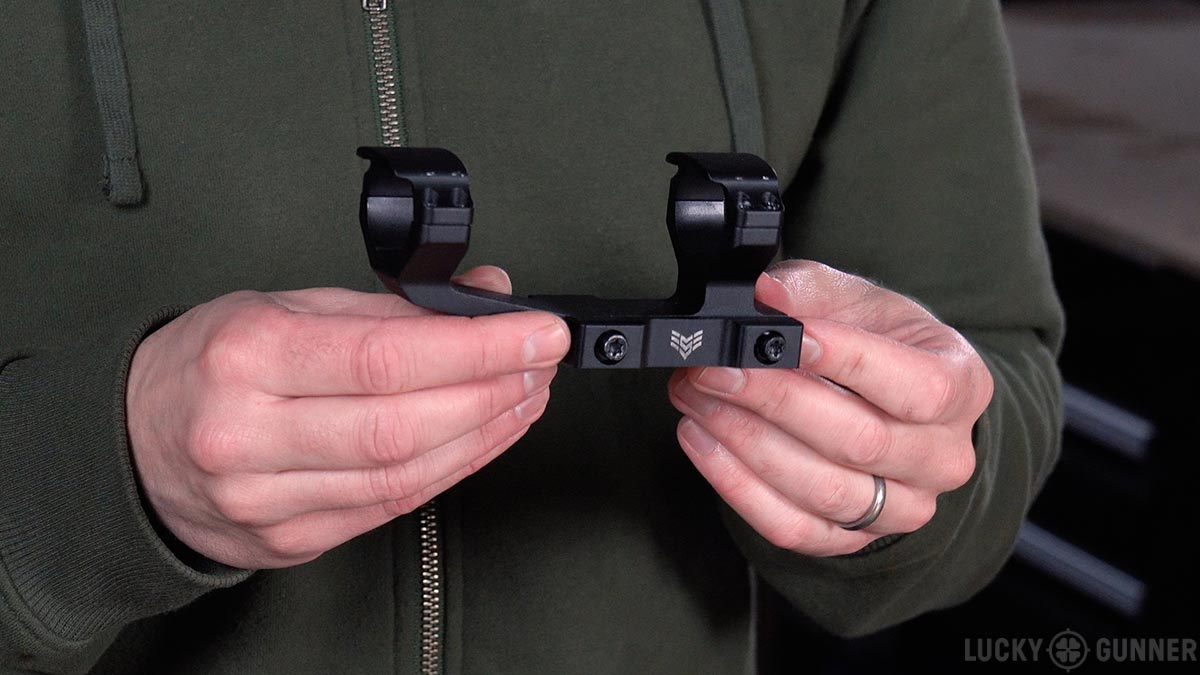
Today, I’m using a mount that Swamp Fox sent us with the Arrowhead scope. It’s called the Independence mount and it has an MSRP of $60. It’s a one-piece mount, which means both rings are attached to the mount that’s going to go on our picatinny rail. I can’t vouch for this particular mount because I haven’t used it yet. But we’ll give it a try and see what happens.
Tools for Mounting an Optic
You will need five tools to mount an optic. You can pull it off without any of these things, but they will make your life dramatically easier:
- Rifle rest or gun vise
- Torque driver in inch-pounds with appropriate bits
- Small bubble level
- Thread locker
- Paint marker or nail polish
You might be able to improvise something for a rifle rest. There are some really cheap ones that work just fine, as well. This is a pretty nice gun vise and it’s got some features that make it easy to work with, but you don’t have to have something like this. A homemade or inexpensive rest is great as long as it holds the rifle upright and level and keeps it from moving while you’re working on it.
There’s really no substitute for a torque driver. A lot of people get away without using one, but I won’t mount a scope without a torque driver anymore. If you think you’re going to mount more than a couple of scopes in your lifetime, it’s a worthwhile investment.
The other stuff — the levels, thread locker, and paint marker are all inexpensive and widely available so there’s no reason not to have them when you’re mounting a scope.
Mounting a Rifle Optic
Okay, let’s start actually mounting the optic.
The absolute first step is to clear the rifle and make sure it’s not loaded. I’m double checking the chamber and mag well. And, of course, even though I know the gun is empty, I will keep the muzzle pointed in a safe direction.
Do You Need a Scope Base?
The next step is one you can actually skip if you’re using an AR style rifle. For some other rifles, you will need to attach your scope base to the receiver. The base is the thing that your scope mount or your scope rings attach to.
Most ARs, as well as a lot of other modern semi-automatic rifles, have what’s known as a 1913 MIL-STD Picatinny rail machined into the top of the receiver. These rails are compatible with a wide variety of accessories including optic mounts.
If your rifle doesn’t have a Picatinny rail or some other kind of built-in scope base, you’ll have to add one before you mount anything. There are too many different types of scope bases for me to show you how to mount all of them. Usually it’s pretty straightforward if you follow the manufacturer’s instructions. However, be aware that some rifles, particularly older ones, may not have a receiver that’s drilled and tapped to accept scope bases. That means you’ll have to consult a gunsmith if you really want to put an optic on the gun.
Initial Placement of the Optic and Mount
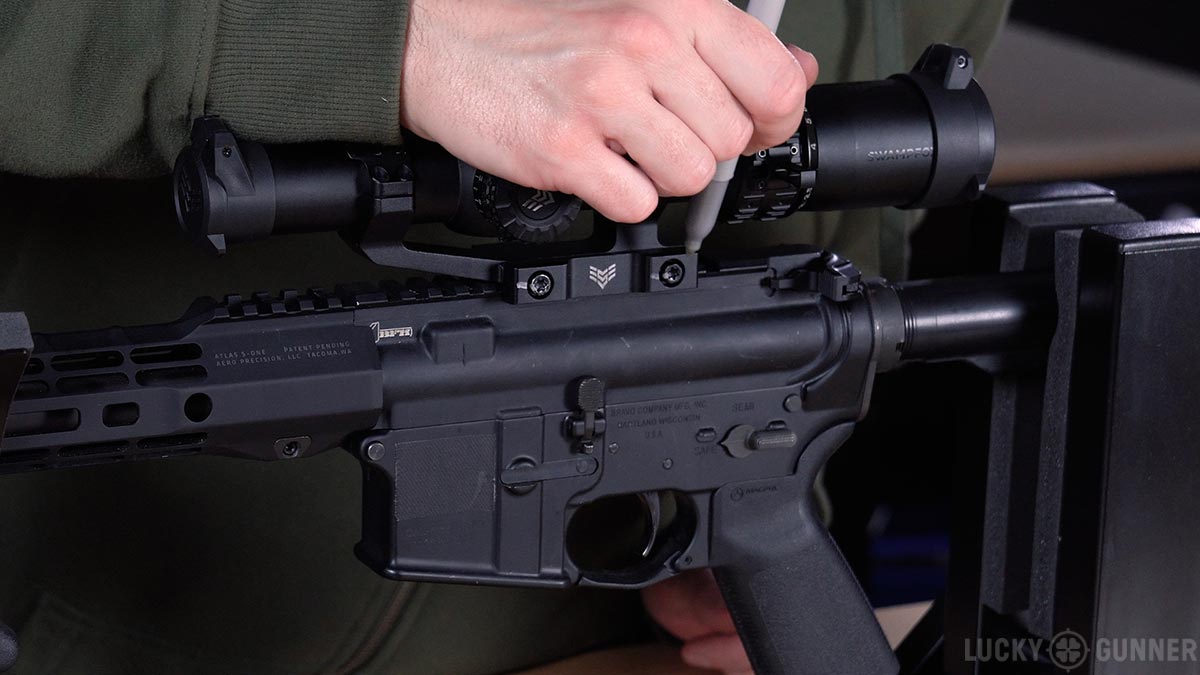
Okay, assuming you have a rail or a scope base, the first thing we’ll do is just place the mount on top of the rifle. I’m not exactly sure how far forward I’m going to want this scope to be, so for now, I’ll just start by putting the mount as far back as it will go. Then I’ll just very lightly tighten the mounting screws. I’m not torquing them down at all right now, I just don’t want the mount to jiggle around while I’m working on it.
Next, I’ll remove the top half of the rings. In this case, each ring has four screws. Yours might have six in each ring, or maybe just two. Get all of those out and put them somewhere safe and set aside the rings for now.
There are two main main priorities to keep in mind when you’re positioning the scope on the mount. The first is eye relief. That’s the distance from the eyepiece to your eye. The second is the cant of the scope. Before we tighten the rings down, we’ll have to make sure it’s level.
So I’m just going to place the scope on the lower half of the rings to get a rough idea of where it’s going to be. Proper eye relief is different for every individual and for every scope. But I happen to know that for scopes like this, I typically want the eyepiece to line up so that it’s just slightly behind the castle nut here on the buffer tube.
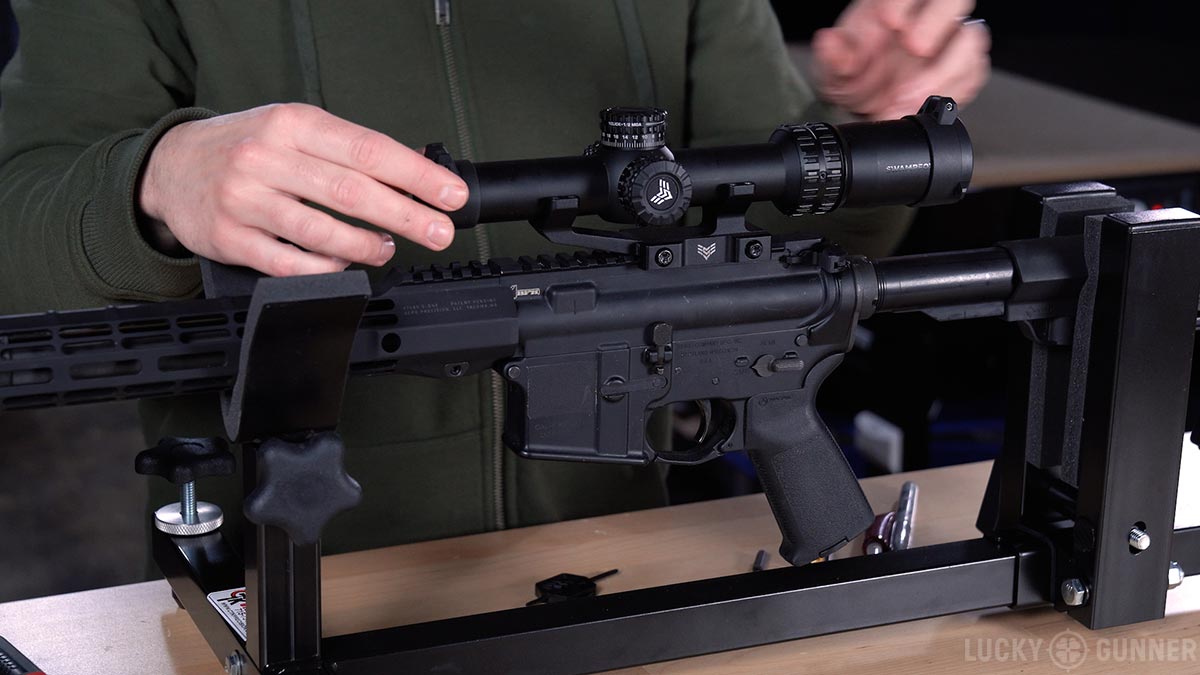
Right now, I can’t get the scope that far forward, so I’m going to move the mount closer to the middle of the receiver. If you don’t know how to guess where your eye relief might need to be, that’s okay. We’re going to figure that out in just a second.
Okay, now it looks like the scope is closer to where I might want it to be. I’ve got plenty of room to move it back and forth if I need to. The advantage of a one-piece cantilever mount like this where the front ring is way in front of the mount is that I can get the mount farther forward if I need to.
On most ARs, the rail on top of the receiver is not actually connected to the rail that’s on the handguard. These are two separate pieces. They’re not perfectly lined up with each other. If I have one half of my mount or one of my rings on the receiver and the other on the handguard, that could cause my aiming point to drift when I’m shooting and we don’t want that. Make sure everything is mounted on the receiver unless you happen to have a receiver and handguard that are all one piece.
Using Thread Locker
Now that the mount is where I want it, I can replace the top half of the scope rings. I will go ahead and apply some thread locker to the screws even though I’m not ready to torque them down just yet. I use purple Loctite 222 for optic mounts. It is specifically designed for screws under ¼” in diameter. Blue Loctite is also a popular option. I’ve had it work just fine, but what I’ve noticed is that if I ever have to take the screws out, the old blue Loctite is much harder to clean up than the purple.
For now, I want these screws to be just tight enough to keep the scope from sliding around freely when I move the rifle, but loose enough that I can easily adjust it. I’m only tightening each screw a little bit at a time because I want the gap between the top and bottom to be roughly equal on both sides. The top and bottom should not be touching. If they are, I’ve either got one side tighter than the other, or I’ve over-tightened both sides.
If you tighten these in kind of an X-shaped pattern, it’s a little easier to get them even. Top screw on one side, bottom screw on the other. Then bottom screw on the first side, and top screw on the opposite side. I also go back and forth between the rings so I don’t get one of them tightened with the other ring having zero tension. That might be a little overly-cautious, but it doesn’t hurt.
Some shooters like the adjustment dials to be perfectly centered in between the two rings. That’s really just an aesthetic thing, though. Functionally, it doesn’t matter if the dials are in the center.
Setting the Eye Relief
Now I can set the eye relief. With a variable magnification scope, the eye relief is more sensitive at the higher magnification levels. So I want to set my eye relief with the scope on its highest magnification. This is a 1-10x scope, so I’ll crank it all the way up to 10. I’m taking the rifle out of the rest for now and I’ll mount it just like I was going to shoot. I don’t have to aim it at anything in particular. A blank wall is probably best.
What I’m looking for is that when I bring the rifle up to my usual shooting position, I can see the entire field of view of the scope. I want to see a nice crisp circle around the entire field of view. If it’s blurry on the sides or I see a dark shadow on one side of the scope, I need to bring the eye piece closer to my eye. If it’s too close, I’ll see a whole lot of black outside of the circle. Eventually, I’ll start seeing a second dark circle inside the field of view.
Once I get it where I want it, I’ll lower the rifle and re-mount it a few times to make sure the eye relief is correct for my natural head position.
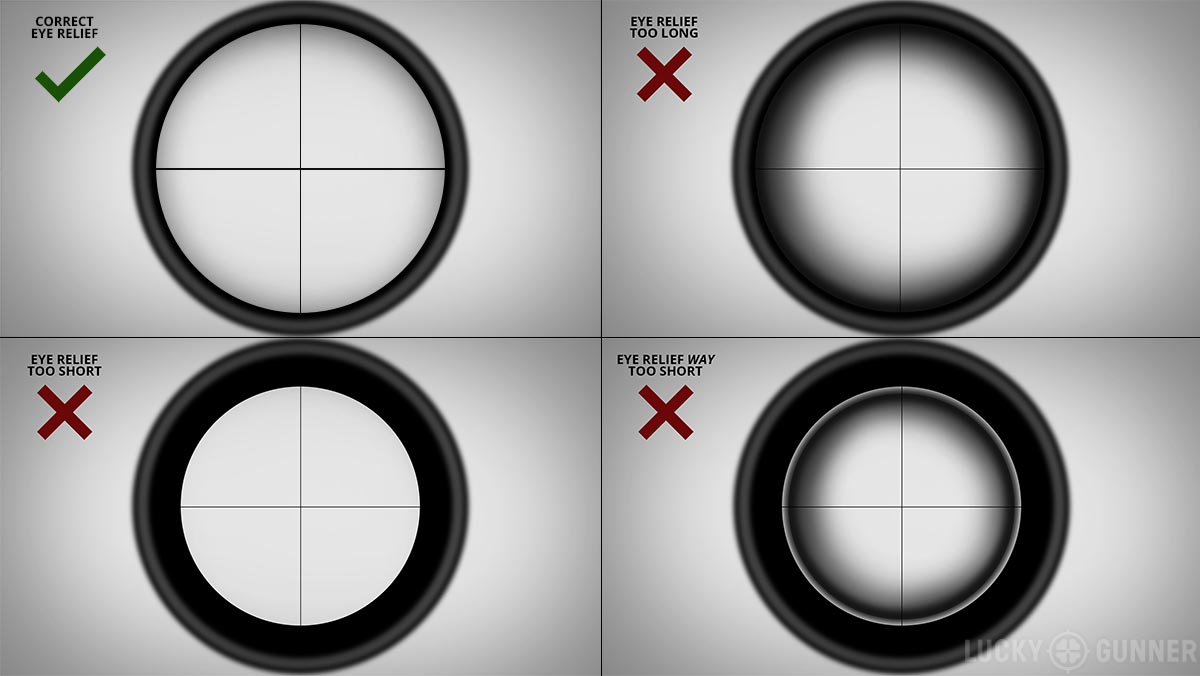
Now, I’m doing all of this from a standing position because it’s easier to demonstrate. But you should check your eye relief from the shooting position you’re going to use the most. Your head position will change slightly between shooting positions which means your eye relief also changes. So if you’re planning to shoot from prone with a bipod most of the time, get down on the ground with your bipod and set your eye relief there. If you’re going to shoot from a bench most of the time, set your eye relief from a bench.
If you’re mounting a red dot, the eye relief is not something you have to worry too much about. You can mount that dot all the way back or way up on the handguard if you really want to and you will probably be able to see it just fine. I tend to position a red dot based on how it affects the balance of the rifle. Usually, I want it back here above the trigger somewhere, but it’s really just a matter of preference.
Torquing the Mount Screws
The scope is where I want it, so now it’s time to torque down the mount. I’ll just put it back in the gun vise here. I’m going to loosen the mounting screws just a little. Picatinny mounts usually have a bolt that goes all the way through the slots on the rail. I want to push the mount forward as far as it will go so those bolts are touching the front of the slots. This is another one of those things that I’m not sure is 100% necessary. But I’ve heard it recommended enough times that I just do it every time now. At the very least, I don’t think it can hurt anything.
I do not usually use thread locker on the mount screws. They’re much bigger and we’re going to torque them down pretty tight. I rarely have any issues with picatinny mount screws coming loose. More often, I’ve had problems with the ring screws or the small screws that join red dots to their mounts.
Now is when I need my torque driver. The proper torque for every mount is a little different. Sometimes the instructions for the mount will indicate the proper torque. Sometimes you have to look that up on the company’s website. And unfortunately, sometimes you just have to guess. Swampfox’s website says to torque the picatinny bolts to 35 inch pounds. So I’ll just set my torque driver to 35.
If you’ve never used a torque driver before, most of them work like this one. When you reach the amount of torque you’ve set, you will hear and feel a distinctive click. That means you’re there. At least with this tool, you don’t have to keep driving it after that click.
Leveling the Scope
Before we torque down the ring screws, we have to level the scope. But I can’t just stick my little bubble level on the scope itself. First, I have to make sure the rifle is level. This can get a little tricky. You have to find a flat spot where your level can fit. Again, I don’t want to use the handguard because it’s not exactly on the same plane as the receiver. Fortunately, I’ve got a little gap here behind the mount where I can fit my level on top of the rail.
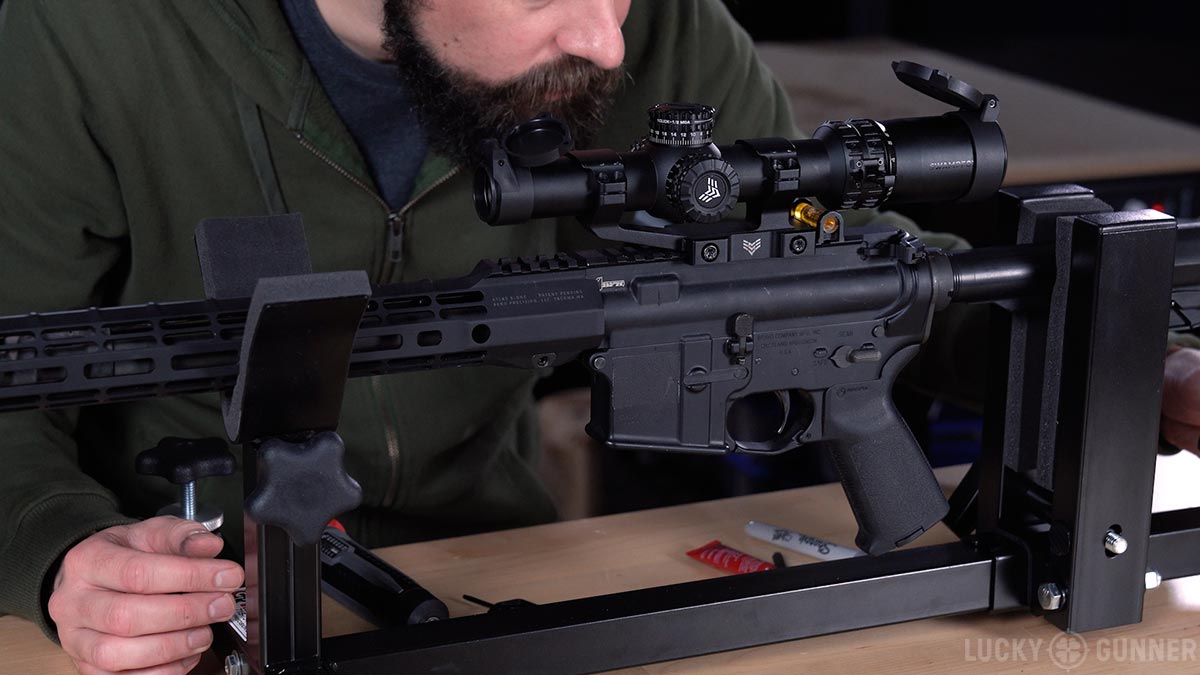
That looks like it’s level, now I can check the scope. Normally, I would just put the level on the top turret here. Mike at Swampfox pointed out that the cap covering the dial is not always perfectly parallel with the inside. So I’m going to remove that first and place the level directly on the dial.
Okay, that’s pretty close to level. Now I’ll just double check that the rifle is still level to make sure I didn’t bump it when I was adjusting the scope. That looks pretty good.
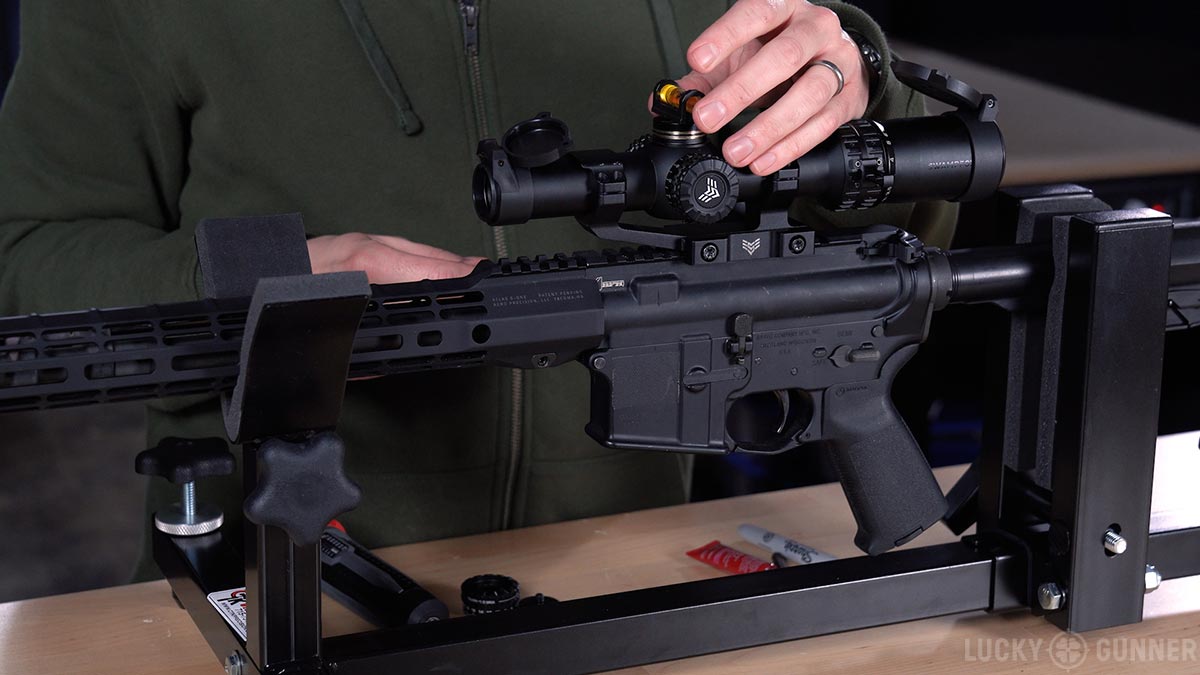
Now I can torque down these ring screws. The torque spec for the rings is always much lower than it is for the base. You want to be really delicate with these screws. If you crank down on them too hard, you can actually crush the scope body. That would be bad.
Swampfox says 10 inch-pounds for the rings. That’s not much torque at all. 10 is the lowest setting on this particular torque driver. Again, I’m going to go in an X-pattern with the screws and check to make sure I have an equal gap on both sides of the rings.
Adding Witness Marks
Okay, there we go. The scope is now mounted. The last thing I’ll do is make some witness marks with my paint marker or nail polish. I’m just making a little line or dot that touches each screw and right next to the screw. That way, I’ll be able to tell if any of the screws start to back out. The screws are always the weakest point of any mounting system. If I start getting flyers or it seems like I’m losing zero, the first thing I’ll check is those screws. If any of them are loose, that’s probably my culprit.
I hope you guys have found this helpful so far. Next time, we’re going out to the range to sight this thing in. Keep an eye out for that in the next week or two. I’ll see you soon.
The post How to Mount a Rifle Scope appeared first on Lucky Gunner Lounge.