Together, we have walked through multiple steps of drawing from concealment. Clearing clothing and gripping your gun, pulling and rotating your gun, and extending the gun forward to fire. This entire series is built on the premise that you must draw your gun to stop an attack.
Tunnel Vision

Before we begin discussing how to re-holstering your gun, it is extremely important to do a full scan and assessment of your surroundings following the use of deadly force against an attacker. In the moments of such a traumatic event, it is easy to have all of your focus singularly on the attacker and not be aware of other threats. This is called tunnel vision. Is the threat over? Does your attacker in any way still pose a potential threat? Is he incapacitated? Once he is no longer a threat, you want to visually scan and listen to make sure there are no additional attackers or threats in the area. You also want to identify the good guys as well. This is important to regain your situational awareness and break through the tunnel vision. It’s not uncommon for there to be more than one attacker so you must be aware and ready. Your mind will be racing and likely your body trembling. It is so important to train these techniques so hard, that your body and mind already know what to do – instinctively.
There are numerous opinions and techniques on how to best scan and assess safely. What is allowed when training on public shooting ranges also differs. Some instructors advocate keeping the gun pointed forward in the low ready position while your head pivots to scan all around. Some prefer bringing the gun into the chest area keeping while keeping the muzzle pointed upward while scanning. Others advocate indexing the gun with the muzzle downward in what’s known as the “Sul” position during the 360 scanning behind you. Each has pros and cons, and ultimately it is your decision on which you feel is best for you.
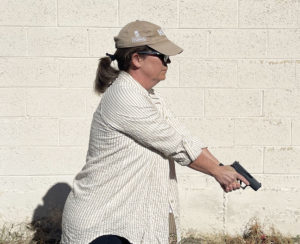
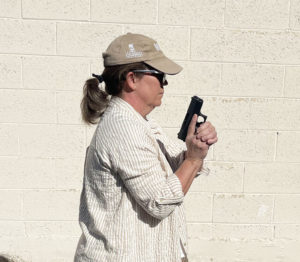
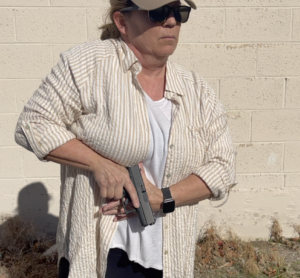
Below, I share the technique I prefer and use. In the tip section, you can adapt the tip to whichever technique you believe is best. Keep in mind, you may not be able to practice this at your shooting range as their rules apply and you must ask them what they will allow.
I am not a lawyer nor a legal expert and won’t begin to try to teach you all of the legal best practices of a defensive shooting incident or the legal ramifications of your actions. You must find a trusted resource familiar with your local laws to guide you. There are reputable resources such as the NRA, USCCA, US Law Shield, and experts and trainers such as Masad Ayoob who can provide you with the information and resources you need to know what you should do or not do if you ever find yourself in this real-life situation.
Technique of Assessing Your Surroundings
Please read the below in its entirety, before attempting these skills. Practice tips and guidelines will follow
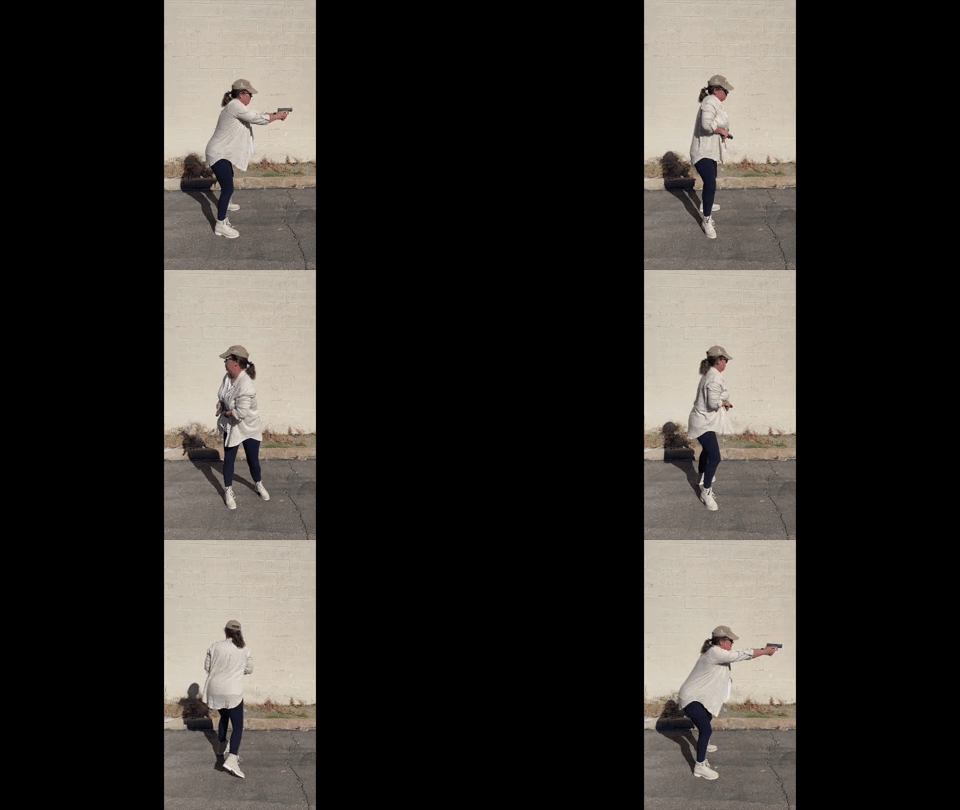
Once you believe the initial attacker is incapacitated, with your arms still extended, lower the gun slightly to provide a clear view over the top of the sights. Take a step to the side (either right or left) and move your head, chest, and arms to the left and right. Do a quick scan of the immediate area around and beside the downed attacker. Taking a step laterally helps to move you out of the way of possible incoming rounds, disrupts, and helps to break tunnel vision, and this initial scan allows you to get a sense of what’s immediately around you.
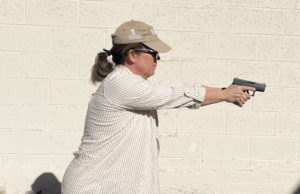
Then, immediately bring your gun back in close, to your chest area. This is called indexing. Lower the gun into the “Sul” position (Sul means “south” in Portuguese) with the muzzle at pointing downward, keeping your feet out of the line of the muzzle. This continues to break the tunnel vision, protects your possession of the gun, allows you to quickly engage another shot if necessary, and keeps any innocent bystanders safe as you continue to scan 360 degrees behind you.
With your indexed firearm in the Sul position, continue your scan behind you by turning at the waist to look all the way behind you, left and right. Bringing your head, chest, and indexed gun in the Sul position around to each side sufficiently to complete a full 360 degree scan. You can take a small partial step or two laterally to “move” as you are likely cemented in place. Don’t step backward as it could cause you to trip. You want to be nimble and ready to move if necessary while maintaining your balance. If it is not necessary to immediately engage another oncoming attacker, come back to your downed attacker and make sure he is fully incapacitated. The challenge is to completely scan and assess everything around you up and down and behind you as quickly as possible AND have the ability to really see and notice the fine details.
Following the use of your gun in self-defense, do not begin the process of slowly re-holstering your gun until you KNOW you are safe. We will cover re-holstering next week.
Practice Tips – Dry-fire Scan and Assess
With UNLOADED HOLSTERED GUN: (check and double-check your gun including looking into the chamber through the top of the slide, verifying there is no ammunition in the barrel, no ammunition in the magazine, and none in the room before doing any practice)
Please see more information on safely practicing with your unloaded firearm in this article: Dry-fire Practice For The Woman Shooter
Record yourself on your phone and re-watch your technique. You can also ask someone to watch you from the side while not ever allowing the muzzle of your gun point in their direction.
We are breaking down the scan and assessment into sections and will begin doing these exercises individually and slowly. Ultimately, with training and practice, this becomes one smooth rapid motion and we have the ability to really cognitively see and understand what is around us.
NOTE: This practice can only be done dry-fire NOT at the shooting range unless your range specifically allows it. It may, however, be part of a defensive shooting course with a qualified instructor and strict supervision on a closed range.
Tip 1
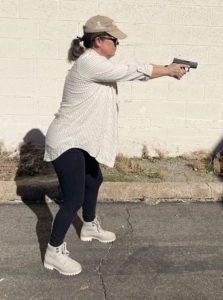
From the Rotate step of the draw, complete the full extension following the steps in Drawing From Concealment Part III. Once you have a complete sight picture, press the trigger and re-align your sights back on the target. This allows you to be ready to shoot again should you need to. Keep in mind, he may be on the ground but not incapacitated.
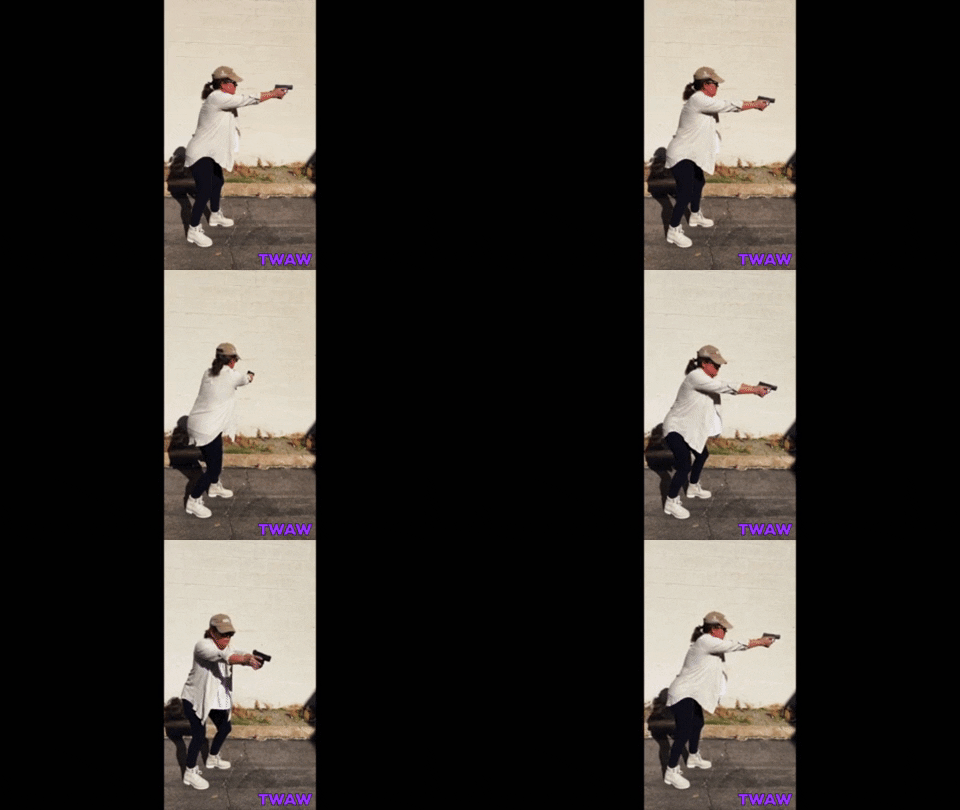
Take a step laterally, to the side, and lower the gun slightly so you can clearly see over the sights. Scan the target to verify the attacker is incapacitated.
Repeat this 10-20 times
Tip 2
Scan the area directly to the right and left of the target as well as behind the target while telling yourself what you see. Examples: “the curtain behind my target is blue”, the lamp to the right is on and the lampshade is crooked”
Repeat this at least 10 times and identify different things within your environment each time.
Tip 3
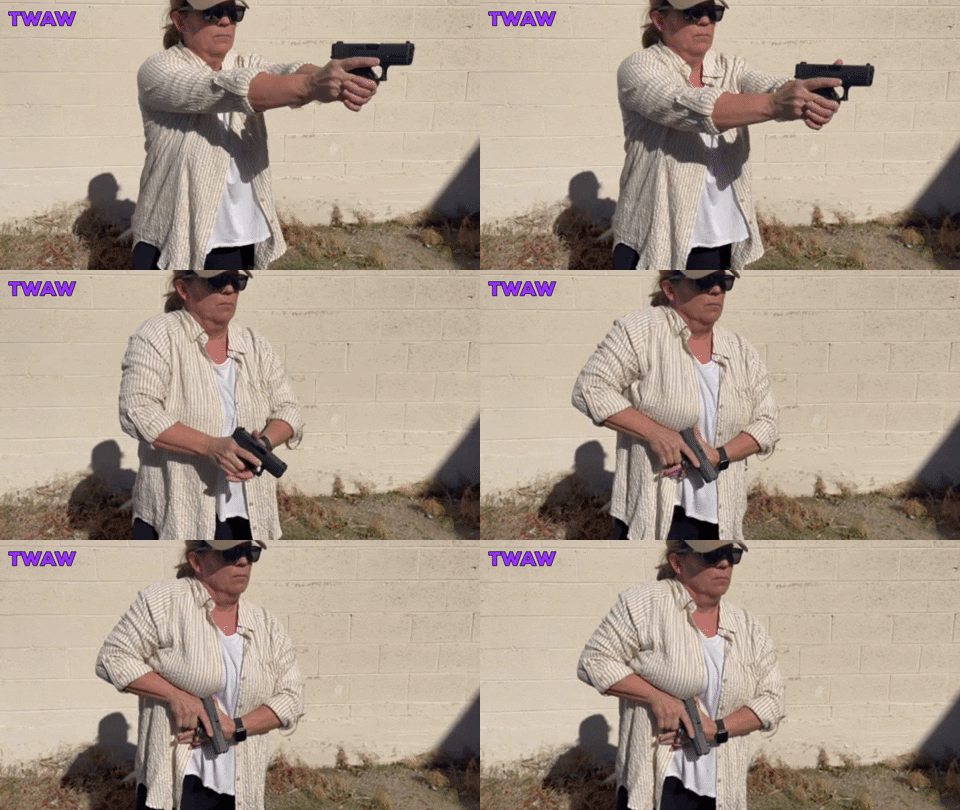
Pull your firearm in toward your chest (Index) while placing your trigger finger extended on the slide of your gun. Lower the muzzle downward ensuring your feet are out of the line of your muzzle. As the gun is arriving at your chest, your non-dominant hand opens with palm facing your stomach, your non-dominant thumb pointing upward. The gun and muzzle of the gun are laid over the non-dominant hand. The muzzle must be pointed downward, not pointing at your feet. Pull your elbows in close to you.
Repeat this 10-20 times or more until it starts to come more naturally.
Tip 4
In the Sul position, elbows in, begin turning your body at the waist, scanning to one side, to see behind you, then to the other side. Remember to return and scan in front of you and your downed attacker. Move if necessary taking small steps laterally with knees slightly bent and agile. Through out this step, verify the angle of your muzzle and where it is pointed.
NOTE: If you are practicing with one of the other techniques mentioned above and are not indexing your gun in the Sul position, DO NOT turn your body with the gun extended! You do not want your gun pointing at any family members or other innocents. You will scan approximately 90 degrees to both sides and have to look over your shoulders while keeping the gun pointed forward to see behind you.
Again, tell yourself exactly what you see in detail. The key in scanning and assessing is REALLY seeing what you need to see and understand what you need to know. Not just looking at it.
Repeat this 10-20 times.
NOTE: If you are having trouble identifying details of what is in your surroundings, have a training partner (after you have demonstrated and allowed them to verify your gun is completely unloaded) stand behind you and slightly to the left or the right. Ask them to hold up some fingers or an object while you are performing your scan. If you are not utilizing the Sul position, do this without turning your body or allowing the gun to pass 90 degrees, report how many fingers or what you saw while scanning. This can help to teach you to concentrate on what you are seeing.
Here is an excellent video from USCCA with my friend, former law enforcement officer, owner of Point Blank Firearms and Self Defense Training, and TWAW Certified instructor, Donna Anthony
Here is a great article for further reading
Pat Rogers article http://www.swatvault.com/columns/training-and-tactics/scan-and-assess/
Once you have determined that the threat is gone and help is on the way, you are ready to slowly re-holster your gun. More on this next week.
The post Drawing From Concealment Part IV: Scan and Assess Surroundings appeared first on The Well Armed Woman.
