At this stage, you have successfully stopped an attacker and saved your life! You have fully scanned and assessed your surroundings. You are safe, and help is on the way. Now it is time to reholster your gun slowly and safely.
Laws and Legal Advice
Remember, you must find a trusted resource familiar with your local laws to guide you in the legalities of using your gun in self-defense . There are reputable resources such as the NRA, USCCA, US Law Shield, and experts and trainers such as Masad Ayoob who can provide you with the information and resources you need to know what you should do or not do if you ever find yourself in this real-life situation.
Technique of Re-holstering Your Gun
Although it might be easy to just say “do the steps in reverse”, it really isn’t that simple. First, if you have just fired your gun to stop an attacker. You have been through a highly traumatic and frightening experience. There will be both psychological and physical impacts to deal with. You could be trembling, crying, and your mind racing. There are many different possible physical and psychological responses and each of us will have a unique response. These possibilities must be considered in your training.
Re-holstering is a Slow Action
Although we are training to be able to quickly and safely draw and shoot our gun in self-defense, we are NOT training to re-holster quickly. This is not a skill to be done with speed in mind. It should always be done slowly and consciously.
Breathe
With your trigger finger out of the trigger guard area and extended alongside the frame of the gun, pull the firearm back to your lower chest/upper stomach. Keep the muzzle of the gun pointed “down range” in a safe direction. Engage your safety if you have one.
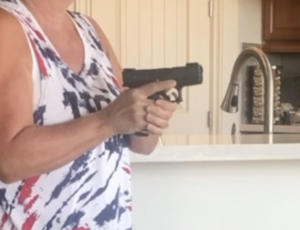
While keeping your trigger finger extended along the slide, use your non-dominant hand to lift or sweep any clothing covering the opening of your holster. It’s important to look at the holster.
For an OWB or IWB holster, rotate your wrist downward and raise your elbow and align the muzzle of the gun with the opening of the holster. Again, look at your muzzle and the holster while aligning.
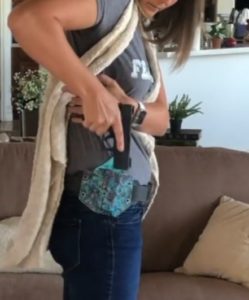
With a wrap type holster like a belly band or leggings/shorts, use your non-dominant hand to fully open the holster. Pull outward on its tab to create an opening large enough to receive the firearm.
If your holster does not have a tab, lift or pull the fabric making sure your hand and fingers are not obstructing the opening where they could be in front of the muzzle.
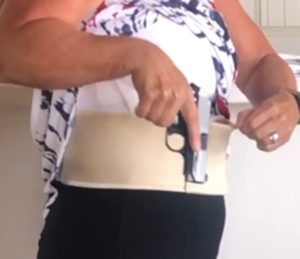
Push the gun straight down into holster while keeping your trigger finger extended and outside of the holster until it is secure.
Re-engage the retention system on your holster if it has one
Tips For Reholstering your gun
With UNLOADED HOLSTERED GUN: (check and double-check your gun including looking into the chamber through the top of the slide. Verify there is no ammunition in the barrel, no ammunition in the magazine, and none in the room)
Please see more information on safely practicing with your firearm in this article: Dry-fire Practice For The Woman Shooter
Record yourself on your phone and re-watch your technique. You can also ask someone to watch you from the side while not ever allowing the muzzle of your gun point in their direction.
Tip 1
Hold your gun in full extension, finger off of the trigger along the slide. Take two slow deep breaths.
Pull the gun back into the lower chest or stomach. Re-engage the safety if you have one.
Repeat 10-20 times.
Be very intentional about your breathing. It is an extremely important part of your training. Following the trauma just experienced, it’s critical that you keep the oxygen flowing.
Tip 2
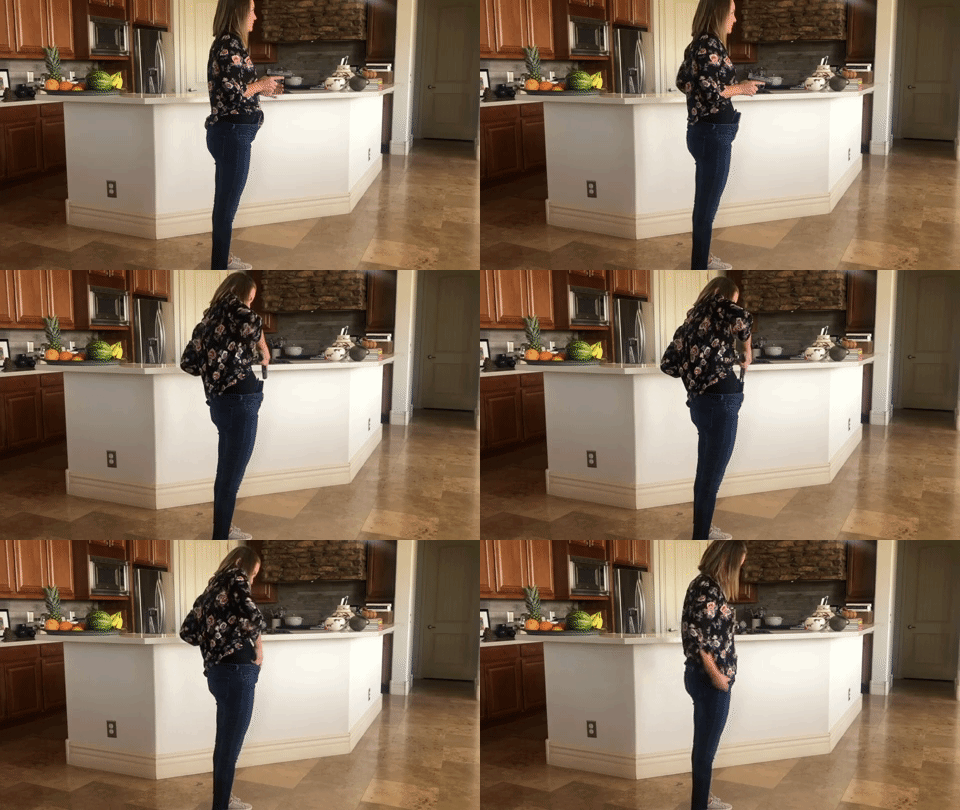
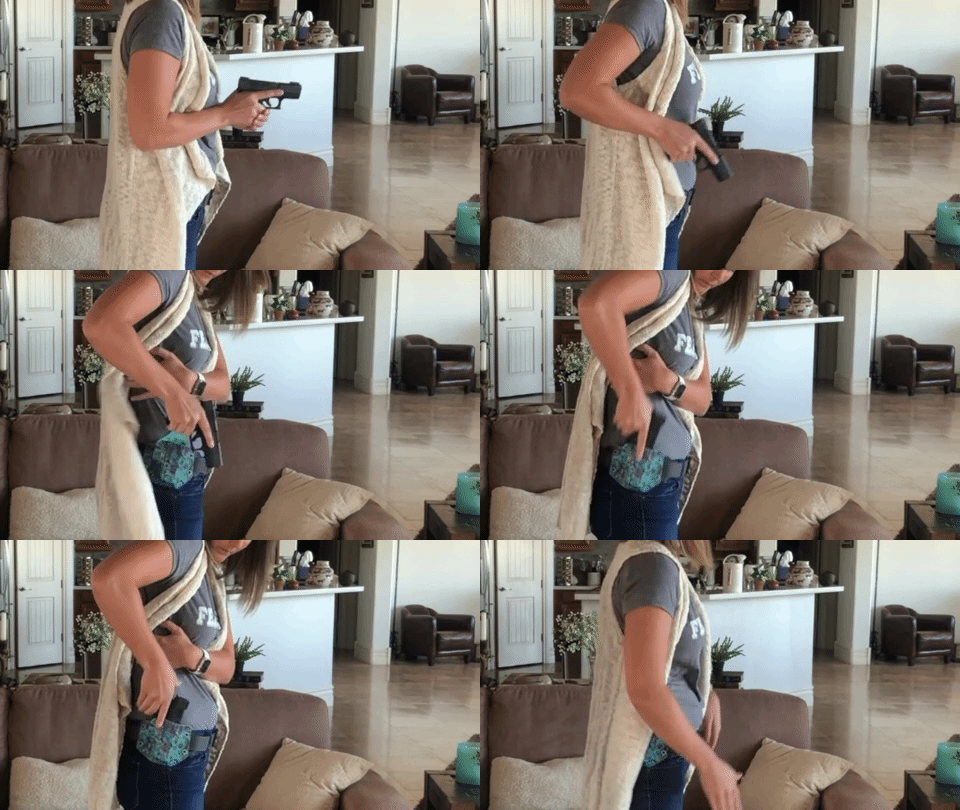
OWB/IWB
Hold your gun at your lower chest or stomach, muzzle forward, and safety engaged. With your non-dominant hand, lift any clothing covering your holster and hold it up out of the way without allowing your arm or hand pass in front of the muzzle.
While holding the clothing and keeping the opening of the holster clear, rotate your wrist downward while raising your elbow, and align the muzzle directly over the opening of the holster. With an IWB holster, lean your hips slightly forward.
Slowly, slide the gun down into the holster while placing your trigger finger outside of the holster.
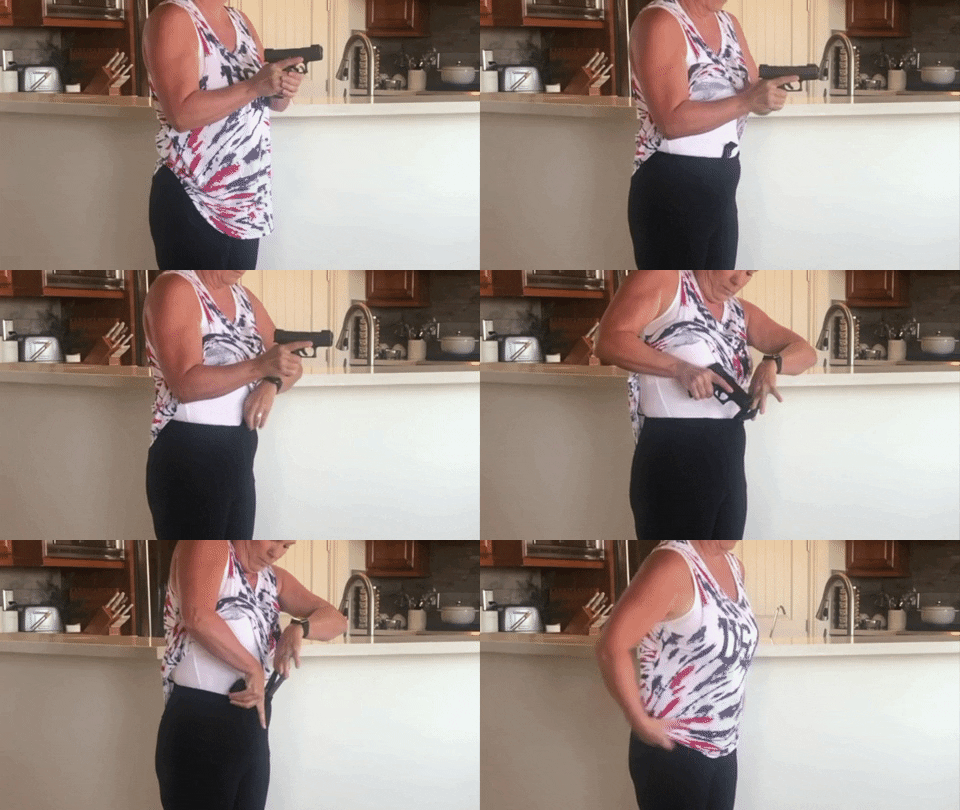
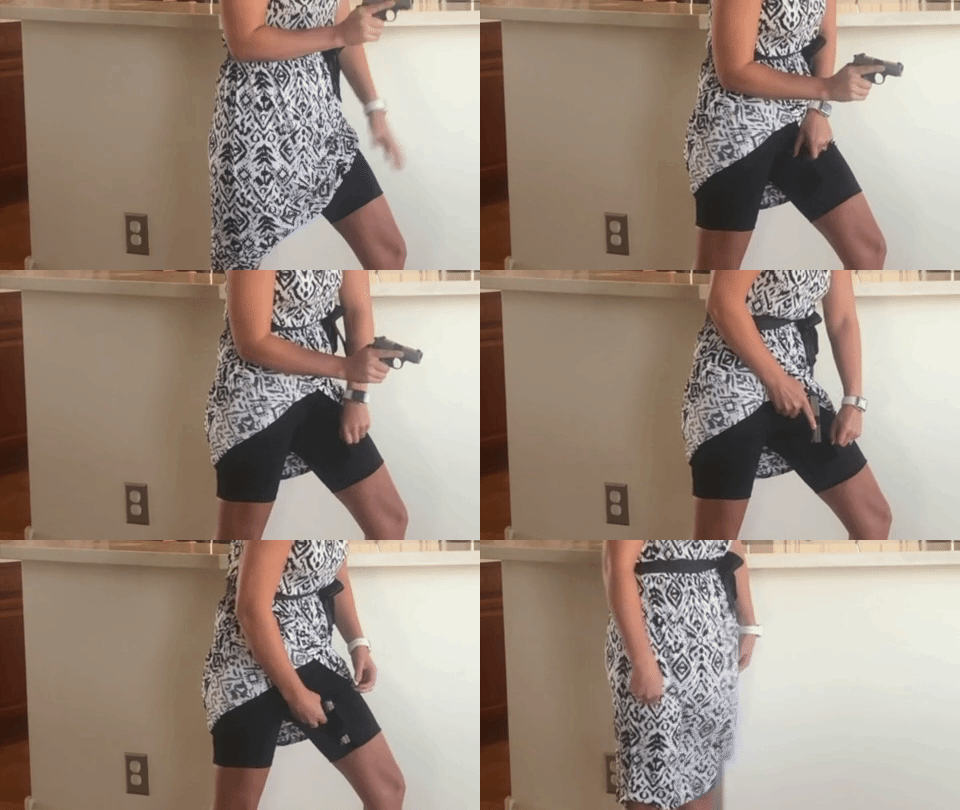
Band/Leggings/shorts/Thigh
Hold your gun at your lower chest or stomach, muzzle forward, and safety engaged. With your non-dominant hand, lift any clothing covering your holster and hold it up out of the way without allowing your arm or hand pass in front of the muzzle.
Use your underarm or elbow to hold the clothing up. With your non-dominant hand, grasp and pull the holster tab to create an opening to receive the gun.
Slowly slide the gun into the holster while not allowing any part of your hand to be in front of the muzzle.
Special Note
With leggings or shorts with an appendix located holster, push your hips slightly forward as you slide the gun into the holster while keeping your trigger finger outside of the holster. This angle keeps the muzzle from pointing directly at your abdomen and feet.
Re-engage any retention snap or strap.
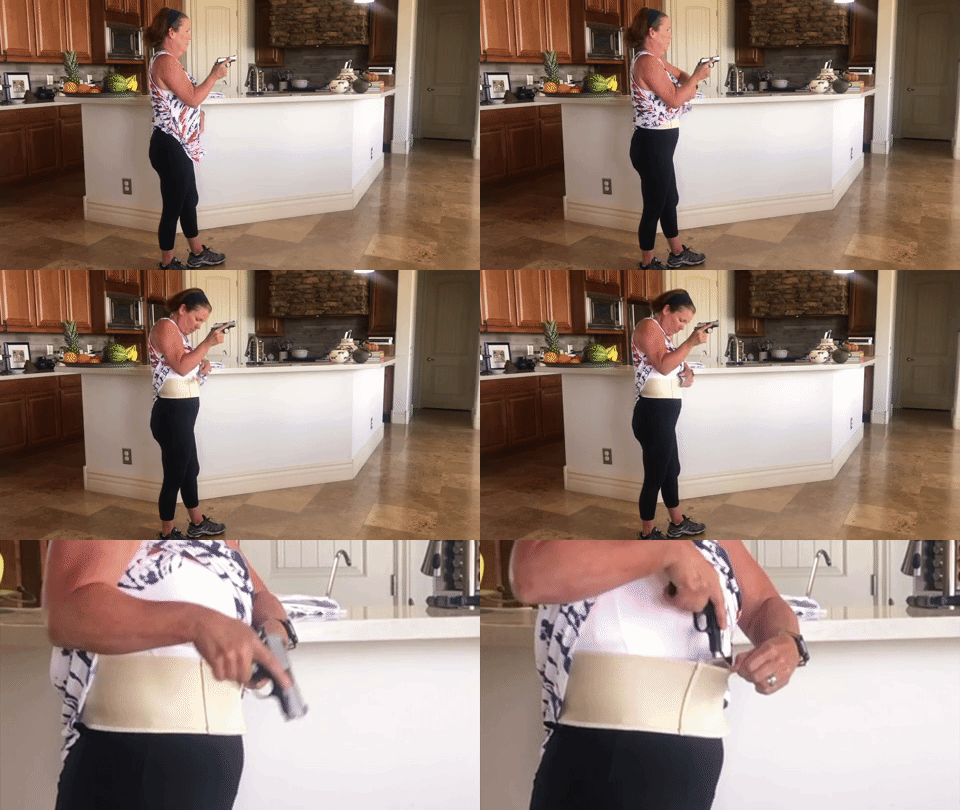
Removable Holsters ie: Sticky, Magnetic Holster, Bra holster
Hold your gun at your lower chest or stomach, muzzle forward and safety engaged. Keeping the muzzle pointed in a safe direction, remove the holster from its location with your non-dominant hand.
Hold the holster from the bottom (the trigger guard area) with the opening facing you. Slowly slide the muzzle into the holster while making sure the muzzle is not pointing at your hand or fingers. Place your trigger finger outside the holster.
Hold the holstered gun in your dominant hand while clearing any clothing with your non-dominant hand. Replace the holstered gun into your waistband or bra.
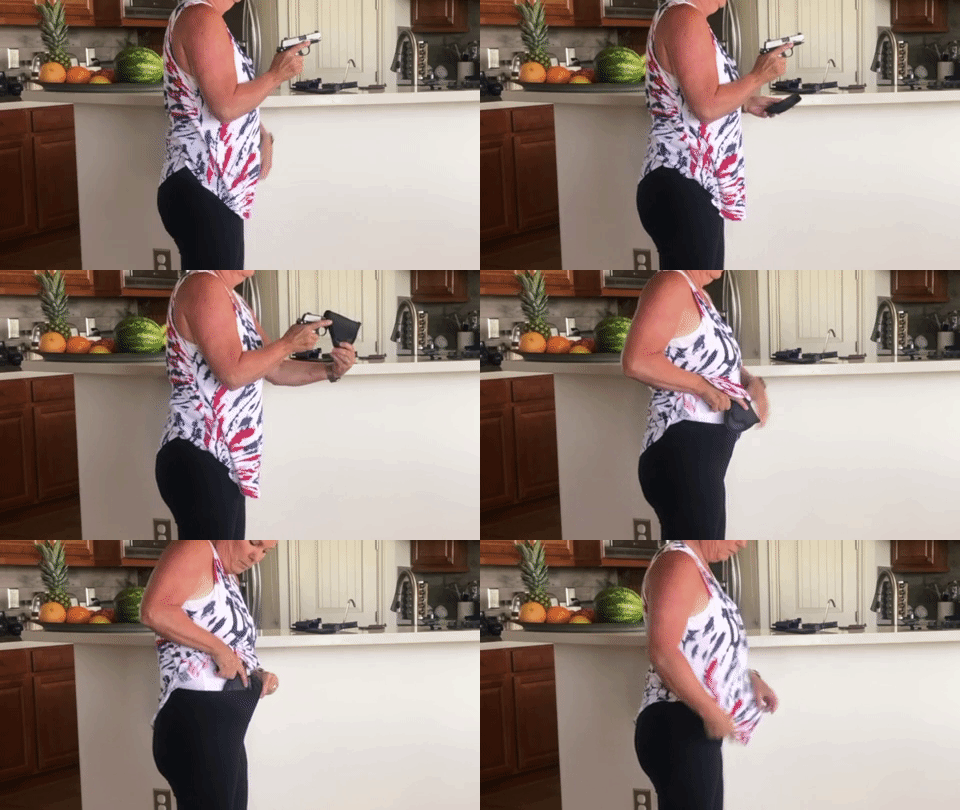
Repeat at least 10-20 times and review your videos.
With all the holsters available, reholstering can look different for each one. However, no matter what type of holster it is, practicing the reholster step is important.
In every case, you must remember to:
Go slowly and to breathe.
Be aware of your trigger finger. It MUST be along the slide of the gun and outside the holster when you are re-holstering.
Stay aware of your body so that you do not muzzle your non-dominant hand or any body part.
In some cases it is safer to remove the holster, as mentioned above.
There is no way to know what situation you could be in and need to use your gun in self-defense. That is why it is so very important to practice the factors we can prepare for. Training the skills we have been practicing builds muscle memory, creates smooth movements, and will help prevent mistakes from being made while under extreme stress. I sincerely hope this series has been helpful to you. Please feel free to revisit any of the steps and keep practicing!
Did you enjoy this thread? Let us know! Are there any topics you would like us to go over? Write a comment below!
The post Drawing From Concealment Part V: Reholster appeared first on The Well Armed Woman.
